
Pumpkins made with recycled boxes
- fatimamholland

- Aug 4, 2025
- 3 min read

Here’s a a great Fall project !
How adorable are these Pumpkins created with recycled empty boxes! A perfect addition to this years Fall decor! 🍁🎃
Seasons roll upon us so quickly so now is the perfect time to create these fun Pumpkin and have them ready to put out for display!
You don’t really need a lot of items to create these cuties at all! 😘
You can Recycle some empty boxes any size you have on hand!
It’s amazing what you can create with them!
I absolutely love being able to create something special with leftover items and bring them back to life as something totally different and simply beautiful!
These pumpkins are a perfect example!
Budget friendly and quick to create!
So I’m sure you have all you need on hand so let’s get to crafting!
Supplies You’ll Need:
Empty boxes any size
Material for your rag bows
Scissors
Paint I used acrylic paint Orange and Burnt Umber
A wine cork
Moss
Hot Glue
Hang tag
Brown paper
Book pages
Elmer’s clear glue
Dried pumpkin stems or you can use branches
Dixie Belle wax
Once you have gathered your items you are ready to create!

I used an empty Baking Soda box and a Fudge Bar box they were the perfect sizes !

I covered my bigger box with the brown paper .
I used my Elmer’s glue for this .
You can paint it if you want but it would require several coats of paint . I really didn’t want to do that .

This is easy and really quick to do!

I then covered my smaller box with book pages.

I only wanted a face on one pumpkin so I chose the smaller one .
I drew the face then cut it out .

Don’t worry if you still see the lines where you drew the face it will be covered .
I also gave my pumpkins a coat of orange paint .
I kept it light especially on the smaller pumpkin with the book pages I wanted the words to still be seen.

I used my dried pumpkin stems and hot glued them on .
I always remove my stems from previous pumpkins and I let them dry so I have them on hand for my pumpkin projects!

Look how adorable already !

I took my Burnt Umber paint and added a little shading around the eyes, nose and mouth .

I love how that looks!

I then also gave my pumpkins some shaded lines with the same brown paint .

I did both of them .

Once they were completely dry I took my brown wax and grunged them up a little more .

I used some moss to apply around the stems .
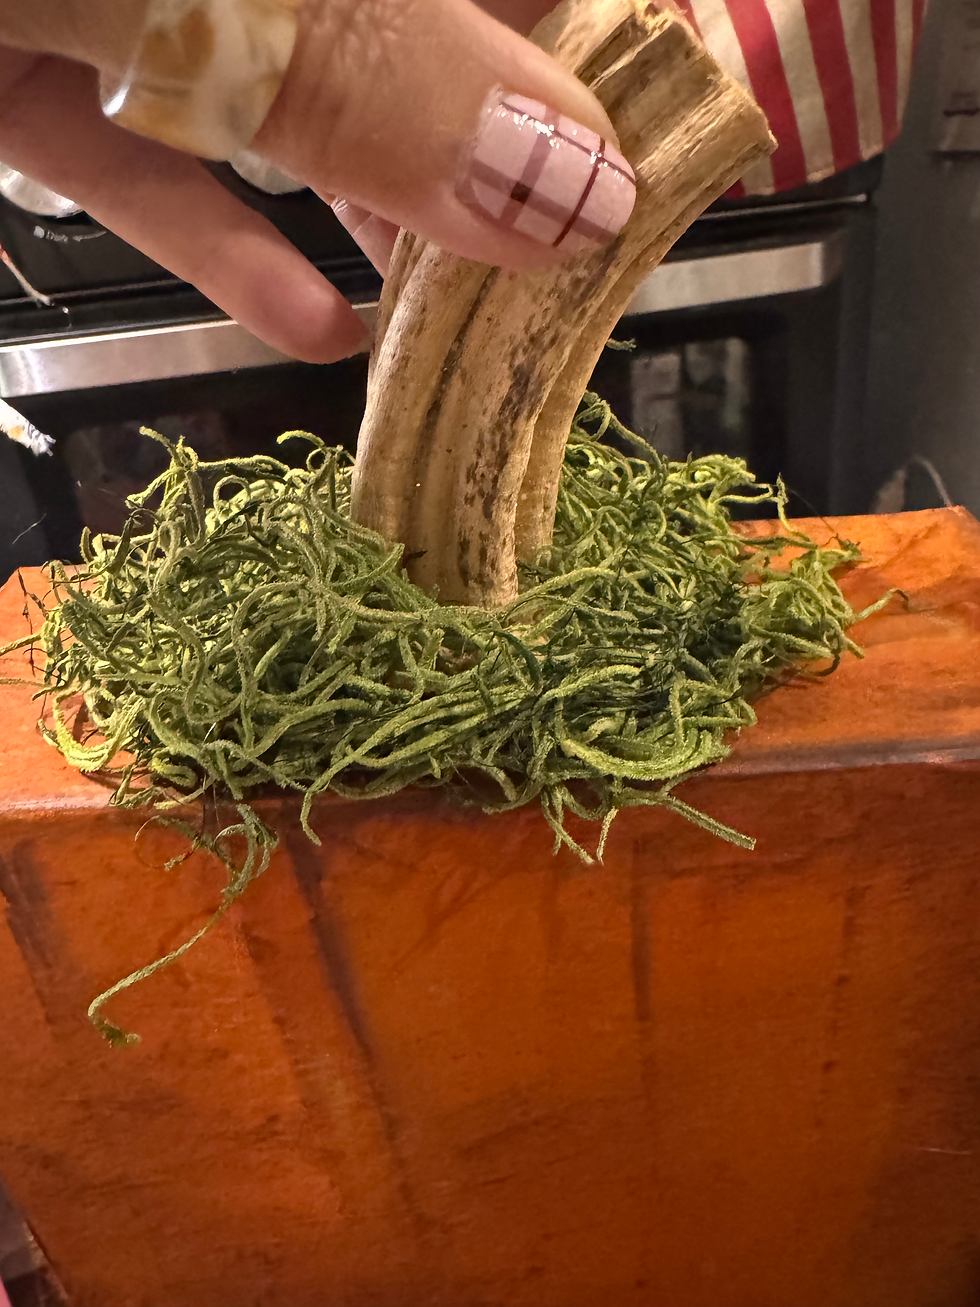
This gives it a nice finished look!

Perfect!

I had this tag on hand that I had prepared a while back and I went ahead and painted a simple pumpkin on it .

I then made my rag bows by using strips of material and attached it to the base of the stems with hot glue!
I also added my cute rusty tag! ❤️🎃

For the finishing touch I added my little cork pumpkins I made! I love ❤️ them !

There you have it so darn cute!
Boxes who would of thought! Sometimes I impress myself! 🤣
Don’t forget to add some sparkling twinkle lights !
Simply adorable! I just love how these budget friendly pumpkins came out!
Just some empty boxes and a little imagination! The skies the limit when it comes to creating!
These cuties will look great wherever you decide to display them!
This is such a fun way to add handmade charm to your seasonal decor and stay on budget!
I’m always so excited to share these creative, budget-friendly ideas with you. I hope you give this project a try and create several of these for your home decor!🎃
What a beautiful way to decorate and still be on track budget wise!
You don’t have to spend a lot to have fun beautiful items to add to your decor for any season!
It all starts just by using a little imagination and a few supplies!
I’m always trying to create adorable budget friendly projects and this one is another perfect DIY for you to tackle !
Please make sure you are following us on Facebook for daily inspiration , recipes and crafting ideas!
You can also check us out on YouTube
Brown wax Dixie Belle
Moss


Comments