
A Little Pumpkin Made With Yarn & Memories
- fatimamholland

- Aug 30
- 4 min read

🎃 A Little Pumpkin Made With Yarn & Memories
There’s just something about making your own seasonal decorations that makes them feel a little more special. ❤️
I recently made this adorable little pumpkin using some chunky orange yarn, and I wanted to share the process with you because it turned out even cuter than I imagined!
But my favorite part might just be the stem. Instead of buying a faux stem, I saved a few real pumpkin stems from last year’s pumpkins and let them dry completely. I knew they would come in handy for a future project—and this little pumpkin was the perfect place to use one!
I love finding ways to bring pieces of nature and things I already have around the house into my crafts. It makes each handmade piece feel like it has its own little story. 🍂
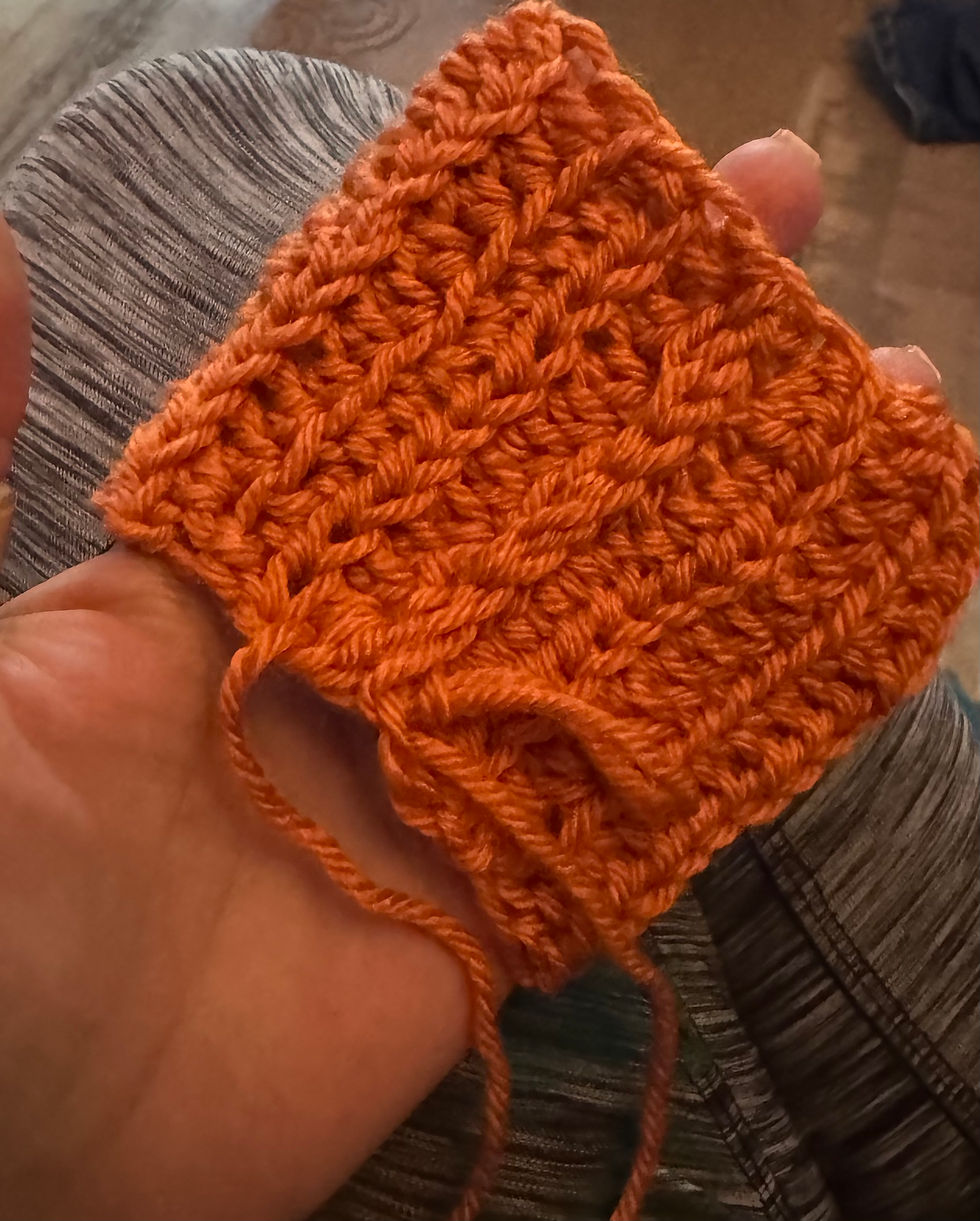
The pumpkin itself is crocheted using a simple rectangle worked in half double crochet. By alternating between working in the back loop only (BLO) and front loop only (FLO), it creates those beautiful ridges that give the pumpkin its texture.
Once the crocheted piece was finished, I shaped it into the pumpkin and used yarn to pull through the pumpkin from top to bottom, creating the little grooves around it.
Then came the fun part—adding the leaf and that beautiful dried pumpkin stem!
🧶 What You'll Need
Chunky orange yarn
Green yarn for the leaf
Crochet hook appropriate for your yarn
Yarn needle
Stuffing
A dried pumpkin stem
Glue
🎃 Crochet Pumpkin
Row 1
Ch 15 (15)
Row 2
14 hdc starting in the 2nd chain from the hook, placing 1 hdc in each chain.
Ch 1, turn.
Row 3
14 hdc BLO (14)
Ch 1, turn.
Row 4
14 hdc FLO (14)
Ch 1, turn.
Rows 5–23
Continue repeating Rows 3 and 4.
Even-numbered rows: hdc BLO
Odd-numbered rows: hdc FLO
You should have 23 rows total.
Finish off, leaving a long tail for sewing.

This is such an easy pumpkin to make!



so cute!

These stems were from some small pumpkins I had last year that I dried!

Perfect!

Love !
🍃 Crochet Leaf
The little leaf is so simple and adds the perfect finishing touch!
Ch 4 and join into a ring.
Crochet 4 hdc into the ring.
Then ch 2 and make a sl st into the second chain from the hook to create a little picot.
Crochet another 4 hdc into the ring.
Join with a sl st and fasten off.
Leave a little tail if you'd like to sew it into place, or simply glue the leaf onto the pumpkin.
🧵 Creating the Pumpkin Shape
Once your crocheted rectangle is finished, sew the two short ends together to create a tube.
Gather one end and secure it well.
Stuff the pumpkin with your preferred stuffing, being careful not to overfill it—you want it nice and plump but still soft enough to shape.
Gather and close the other end.
Now for my favorite part!
Using yarn and a yarn needle, I pulled the yarn from the top of the pumpkin down through the center and around the outside, spacing the pulls around the pumpkin to create the grooves and sections.
Pull the yarn firmly enough to create the pumpkin shape, but not so tightly that it distorts the crochet stitches.
🍂 The Finishing Touch
For the stem, I used a real dried pumpkin stem that I saved from last year's pumpkins.
I just love this little detail!
Instead of throwing those stems away after pumpkin season, save a few and let them dry completely. They can be used later for crafts and seasonal decorations.
Once I had the pumpkin shaped the way I wanted, I glued the crocheted leaf and dried stem right onto the top.
And that's it!
A little yarn, a little creativity, a piece of last year's pumpkin—and suddenly you have the sweetest little fall decoration. 🧡🍂
✨ I think that's one of my favorite things about handmade decorating...
You don't always need fancy supplies to make something beautiful. Sometimes the best projects are made from what you already have, a little imagination, and a whole lot of love.
I hope this little pumpkin inspires you to look around your craft room, your yard, or even your leftover seasonal decorations and see what kind of magic you can create!
Happy crafting, friends!
🧡🎃🍂
The Twirling Feathers
That’s it so darn cute!
So inexpensive!
Perfect for the Fall season!
I absolutely love how this little pumpkin came out!
I hope you give it a try !
I know you will absolutely love it like I do!
And you know me I’m always looking for ways to create something beautiful without breaking the bank.
Simple. Sweet. Creative.
Just the way we like it. 💕
If you make some, I’d love to see yours!
Fatima ❤️✨
Please make sure you are following us on Facebook for daily inspiration , recipes and crafting ideas!
You can also check us out on YouTube
Yarn Orange
Yarn Green


Comments