
Pea Gravel Patio
- fatimamholland

- Apr 19, 2024
- 3 min read
A few weeks ago I went up to my visit my daughter, son Inlaw and granddaughters in Fort Worth .
I went prepared to help work on the landscaping and Flower beds!
It was the perfect week the weather was just right for tackling all these out door projects!
I first worked on the main Flower bed I will do a blog on that one soon we used such beautiful plants !
It turned out beautiful!
The next project was this Pea Gravel Patio.
I’m not an expert on creating Patios by any means but with a little research on YouTube we figured out what we needed to use to create the look my daughter was wanting to achieve!
Supplies we used:
• 6 Bags of Paver Base
• 6 bags of Decomposed Granite
• 6 bags of Pea Gravel
• 10x10 Tamper this tool is used to stamp everything down.
The area we were working with was a 9’x10’
Total cost for materials was about $90.00

This is the first step . Paver Base
Before doing this I did remove all the mulch that was in that area and was able to use it somewhere else.

This is the second step . Decomposed Granite
Once each layer is on you Stamp it all down .

This is the third step . Pea Gravel
This is your last layer .

Once I spread all 6 bags of the Paver Base I took my Tamper tool and went over all of it stamping each area until it all was pressed into the ground.

When I removed the mulch there was already a layer of weed cloth in that area so I left it on there.
I put the Paver Base right over it .

I used a rake to help spread it out .

It was a pretty sunny day and there was a large tree over where I was working so I tried to take the best pictures possible.

I got to know this Tamper Tool pretty well .
It’s gives you a good workout! 🤣
The other good thing about this tool is that a friend that I know let us barrow it for this project.
You can purchase one for about $50 I’ll drop a link for it .

Once that layer was done I did the same thing with the Decomposed Granite I use 6 bags and spread it over the first layer using my rake .

Go lightly with the rake when you are spreading it so you keep each layer on top of each other.

It should look like this .

Once again take your tamper and stamp it out .

You might need a break at this point !
I know I did !🤣

I also had an audience the utility company decided they needed to work directly across the street! 🤣
So I acted like I knew what I was doing! 🤣

Here is the last step ! Pea Gravel
I spread all 6 bags of the Pea Gravel.
Raking it across.

Then once again here I am stamping it out !

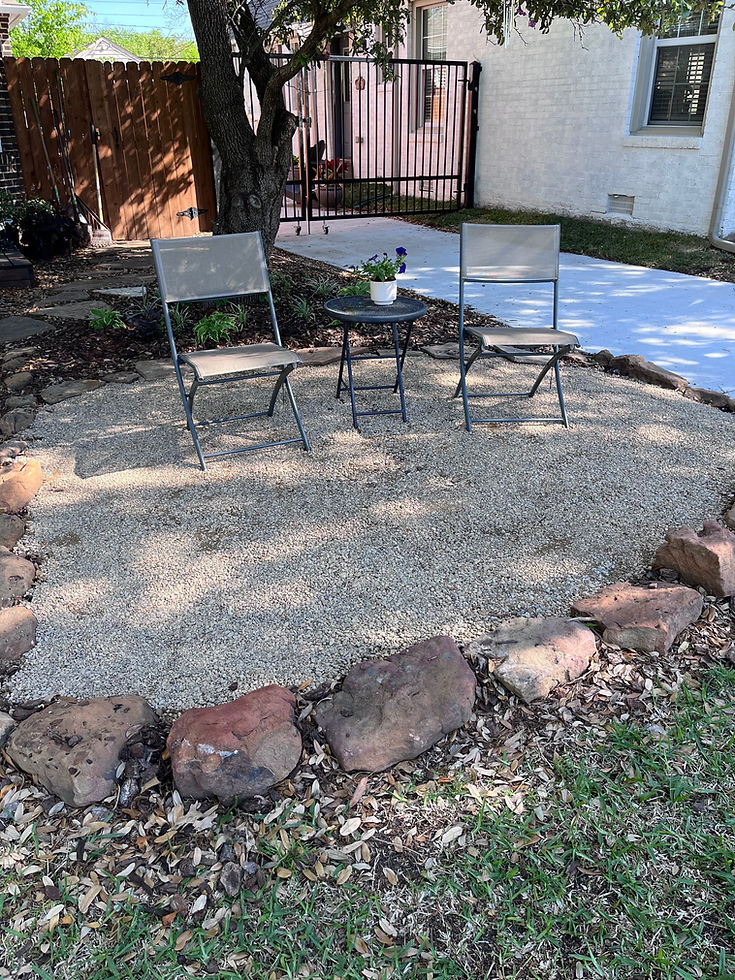
Look how pretty it looks !
My daughter already had the Sandstones so it was the perfect finishing touch !

I think it came out really awesome if I do say so myself!
My daughter , Son Inlaw and the girls loved it too!
We had serval neighbors complement the landscaping and patio as well!
This was a super fun project!
Also very budget friendly!
If you are wanting a nice area to sit at and you want to keep it low cost this is a perfect project for that !
All the materials came from Home Depot.
Always remember It all starts just by using a little imagination and a few supplies!
I’m alway trying to create budget friendly projects and this one is right up there for sure!
I hope you give this fun project a try !
Please make sure you are following us on Facebook for daily inspiration and crafting ideas!
Happy creating!
Tamper tool


Comments