
Tree made with Brown paper
- fatimamholland

- Jul 25, 2025
- 3 min read

Here’s another fun and easy project you just have to create! 😀
I was inspired by The Silver Farmhouse on this project so make sure you check hers out !
You don’t really need a lot of items to create this Whimsical Tree!
You can Recycle that brown paper packaging from your Amazon boxes or pick up some inexpensive brown paper at Hobby Lobby , or any place that sells craft supplies.
You can even use brown paper sacks !
I absolutely love being able to create something special with leftover items and bring them back to life as something totally different and simply beautiful!
This tree is a perfect example!
So I’m sure you have all you need on hand so let’s get to crafting!
Supplies You’ll Need:
Brown paper
Hot glue
Scissors
styrofoam Tree Cone or you can make one with a piece of cardboard
Garland of your choosing
Coffee solution in a spray bottle

I gathered my supplies and I was ready to start!
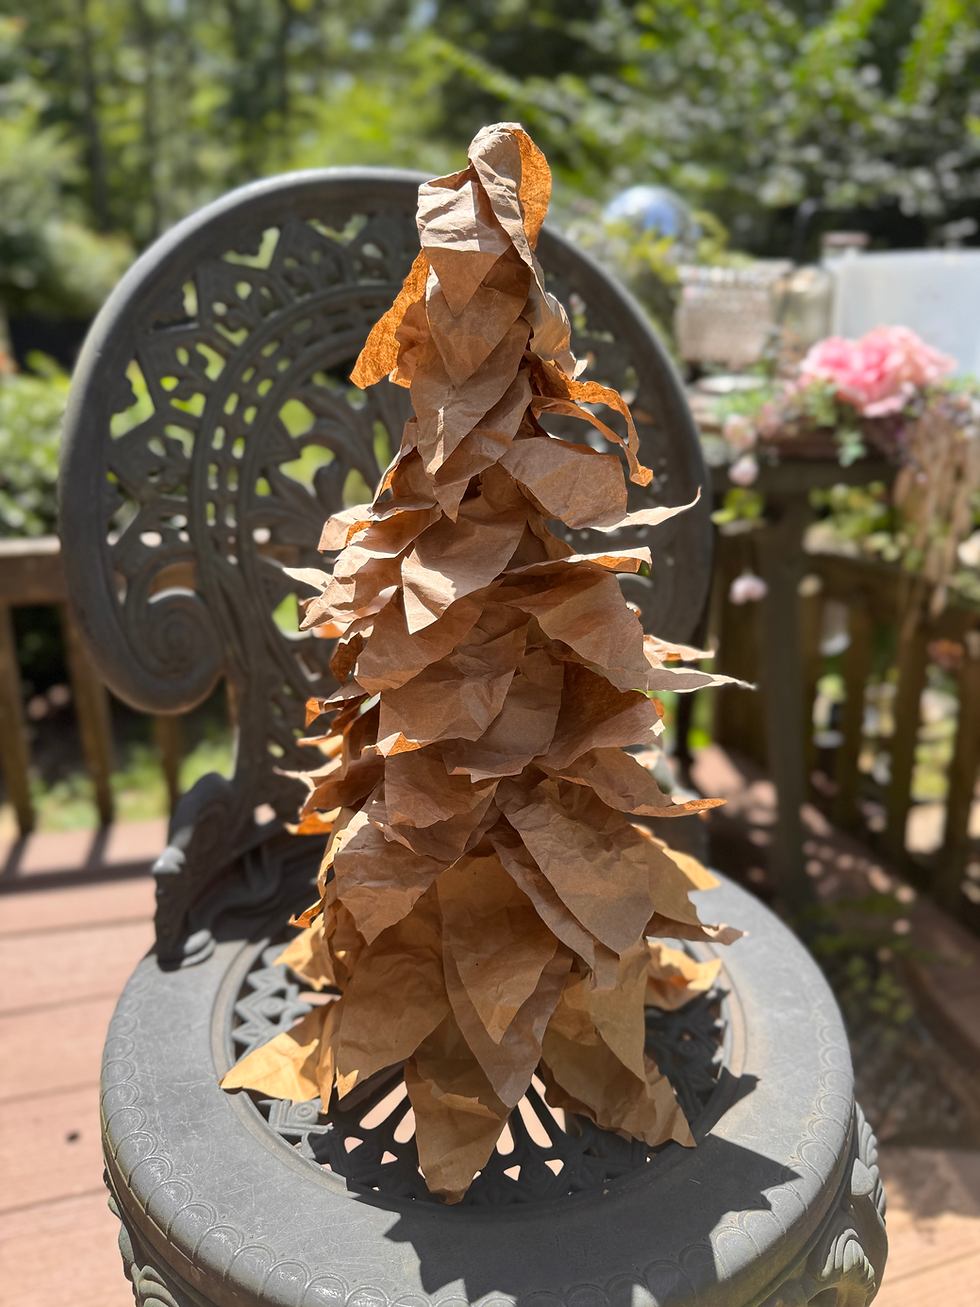
The cone I used was about 16” tall .

I first got my brown paper and folded it so I could cut more petals for it at a time.

The larger petal is about 5” tall by 2 -1/2 “ wide at the bottom . It doesn’t have to be precise.
I really don’t have an exact amount to cut I just eyeballed it as I went .
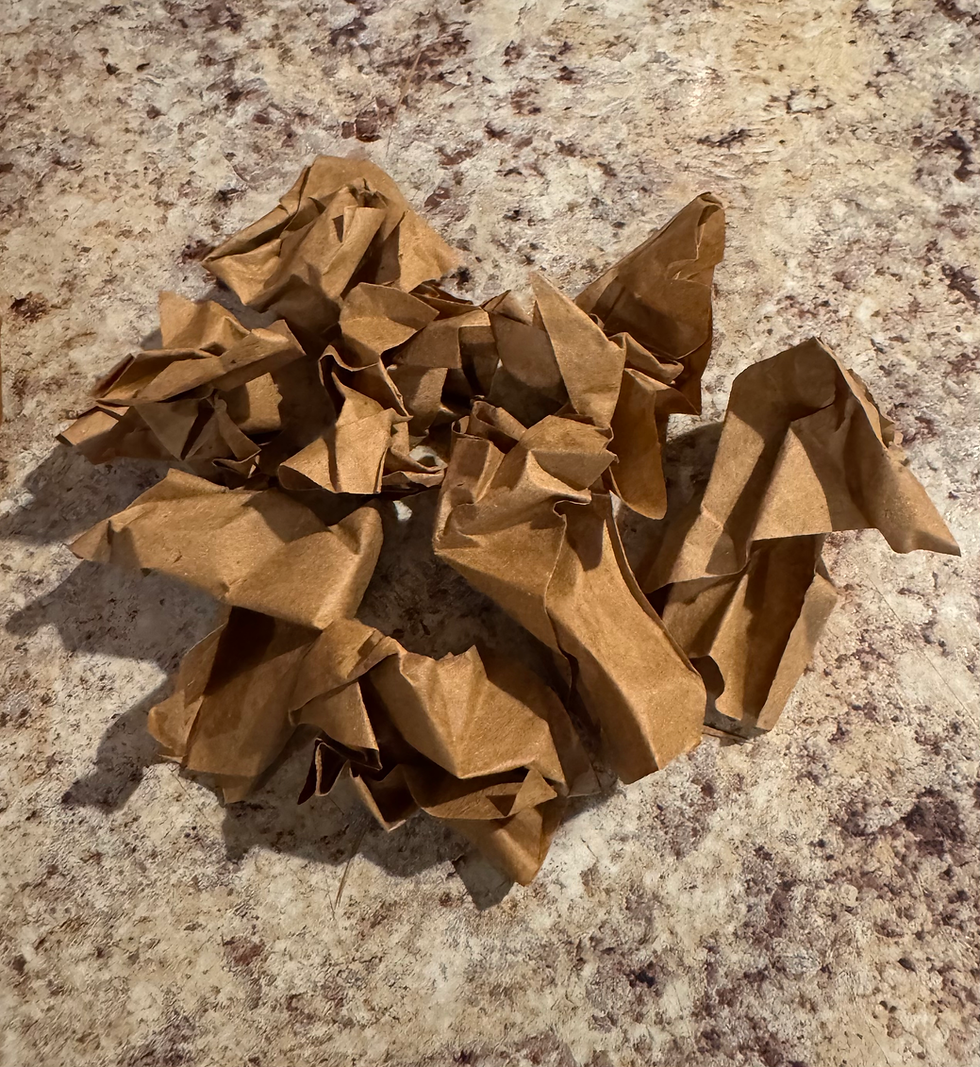
Once I cut them out I crunched them up .

Then I opened them and they were ready to start gluing to the tree.

I just started gluing them a layer at a time .

All the way around. You can stagger them as you go so they are not perfectly stacked on each other.

Just keep going .

Once I got to this part I added a few smaller petals to the top facing up . You will see it on the following picture. From this point on you will glue the smaller petals.

These are the two size petals you will need. The smaller one measures 4” x 2”

Glue 3 of them this way . Then glue the smaller petals the way you were gluing the bigger ones.
You will glue the rest of them with the smaller petals .
You will also gently pull the top ones down over the rest of the petals . So it all flows together.
Hopefully that makes sense.
Once I was done I brought my tree outside and I sprayed it down with my coffee solution!

I saturated it really well !
I let it dry in the Sun !
The coffee solution is just a cup of coffee mixed with a cup of water in a spray bottle.
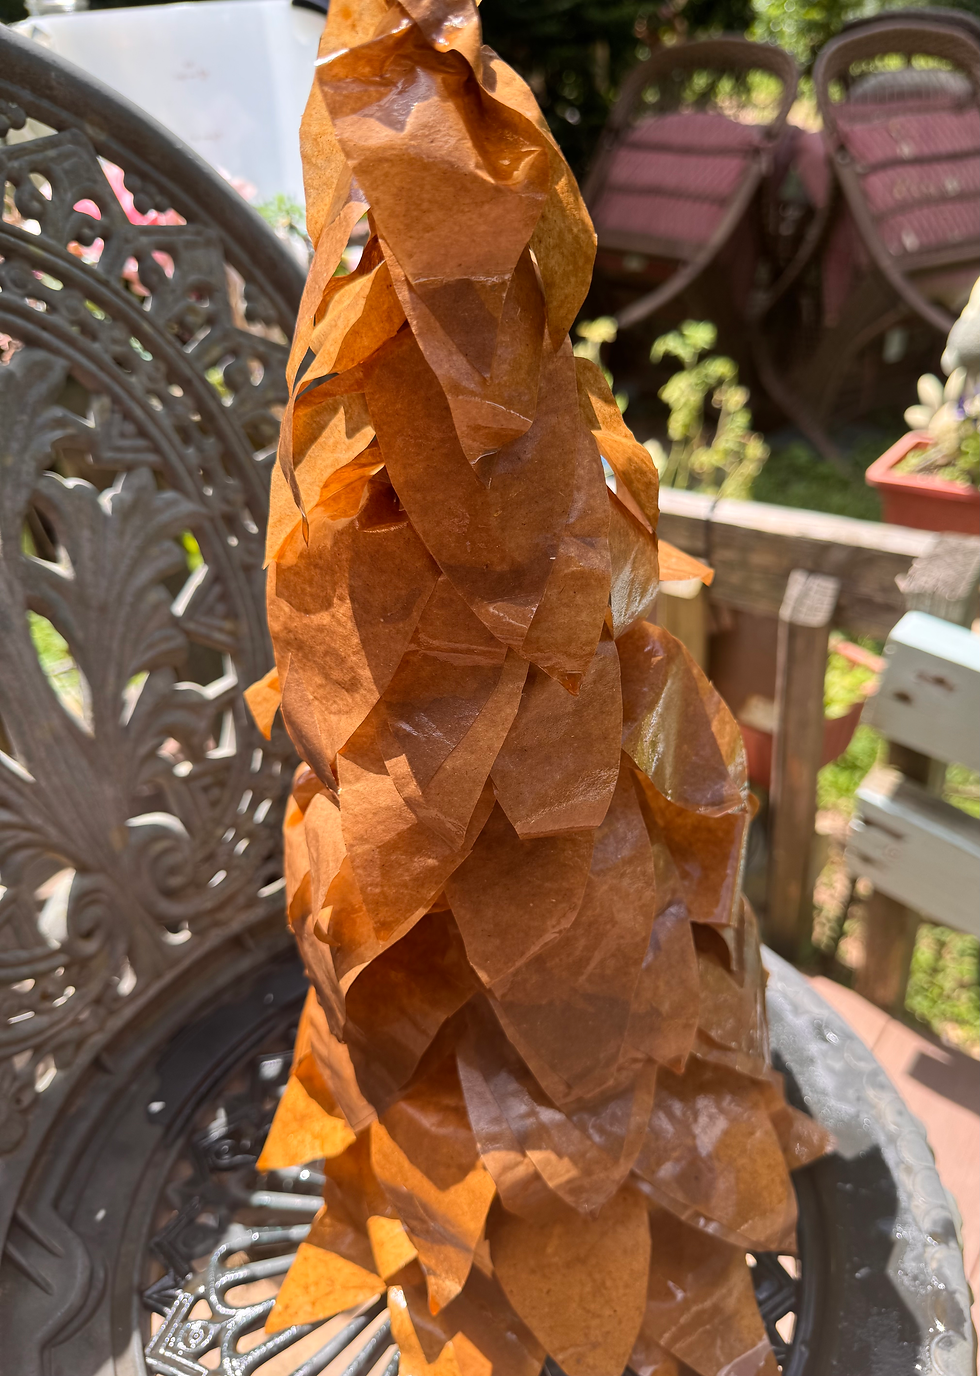
It’s pretty wet for sure! 🤣

Once it was dry I crunched up the petals pretty well !
Then added this adorable garland .

Simply adorable! I just love how this whimsical tree came out !
I also added some twinkle lights!
This tree can stay out all year long if you choose too!
This is such a fun way to add handmade charm to your decor!
I’m always so excited to share these creative, budget-friendly ideas with you. I hope you give this project a try and create several of these for your home decor! 🌲
What a beautiful way to decorate and still be on track budget wise!
You don’t have to spend a lot to have fun beautiful items to add to your decor for any season!
It all starts just by using a little imagination and a few supplies!
I’m always trying to create adorable budget friendly projects and this one is another perfect DIY for you to tackle !
Please make sure you are following us on Facebook for daily inspiration , recipes and crafting ideas!
You can also check us out on YouTube
similar garland


Comments